Monday, June 07, 2010

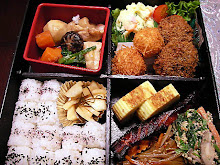
Taste the season: Japanese butterbur (FUKI)

 am not sure the proper English name but "Japanese butterbur" is what I got from the discionary. It's called Fuki in Japanese.

In my hometown Akita, Fuki is one of the seasonal vegetables that represent spring. When I find Fuki on the dinner table, I know the spring has come. 

This is the appetizer dish that my mother used to make a lot with Fuki in season. I really didn't care for it as a child but what kind of kids would like some green stems cooked with mushrooms and bean curd? Well, now I am glad that I have grown into an adult that can appreciate this wonderful seasonal dish.

This dish is great as is as an appetizer or side dish to add to a a main meal or a bento item, as it lasts long and tastes good when cold.
Ingredients:
Local fresh Fuki 1~2 lb, as much as you like :-)
Dried shiitake mushrooms soaked in water overnight 8 ~ 10 or any fresh mushrooms
Fried Bean Curd (abura age) - pour hot water over and rince the curd briefly. Cut it into 2 inch squares.
Red chili pods 3 ~4
Dashi (or you can use the water used to soak shiitake mushrooms)

1. Peel strings off the fuki stems by hand
2. Boil water in a deep pot and cook fuki or about 30 minutes. You can see the color of the water turn brown while cooking.
3. Strain fuki and soak them in fresh cold water (you can store teh cooked fuki in water for at least several days in the fridge)
4. Slice soaked shiitake mushrooms, 1/4 inch thick
5. Cut Fuki into 1.5 inch long pieces
6. In a medium size pot, put in 1 tabelspoon of sesame oil and 1 tabelspoon of canola oil over medium-low heat. Add the red chili pods. Heat the chili until you begin to smell the heat from it.
7. Turn up the heat to High and add Fuki. Fry Fuki for about 5 minutes.
8. Add the mushrooms in. Add in dashi or shiitake water depp enough to cover the vegetables. Add 1/2 sake, 1 cup mirin and let alcohol evaporated.
9. Add 1/2 cup soy sauce and turn the heat down to medium.
10. Add the bean curd and cook until the liquid reduces down to about half an inch depth (for about 30 minutes)

Store the dish in the fridge and enjoy it with Beer, Sake or over warm steamd rice!


 On another note, I also talked about seasonal ingredients on the PCC podcast:

Wednesday, May 26, 2010

Jammers at home!

My favorite bakery - The Grand Central. My favorite baking book - The Grand Central Baking book. It only makes sense, right?

Isn't it amazing that you can reproduce your favorite chocolate chip cookies, shortbread and Jammers at home, right on your table?! Yes, I like their Jammers, because they are not sweet, except for the fresh jam topping, which is the perfect company for the buttery & salty biscuits. But what I love most about the jammers is the flaky & crumbly texture! After all I realize I am a texture person too I guess.

So here it goes. My version of the jammers - extra crunchy outside.

(The recipe below is from "The Grand Central Baking Book")
Ingredients (10 to 12 jammers according to the book but I ended up making more than 20!)
4 cups all-purpose flour
3 tablespoons sugar
2 teaspoons baking powder
1 1/2 teaspoons salt
1 teaspoon baking soda
1 cup cold unsalted butter
1 1/4 to 1 1/2 cup buttermilk
Your favorite jam for the filling

1. Combine the dry ingredients (teh top five ingredients above).
2. Dice the butter into small cubes and blend them into the dry ingredients either by hand or using a stand mixer. There should be tiny pieces of butter remaining. That's the key to flaky biscuits! (You can store this dough in the fridge overnight if not baking immediately.)
3. Mix the flour mixture with buttermilk (1 cup first) by using a stand mixer or by hand in a bowl. The dough should look messy and come in a few big clumps.
4. Turn the dough on a floured working surface and pat it into 1 1/2 to 2 inches thick.
5. Use a biscuit cutter (2 1/2 inch diameter) cut the dough into circles.
6. Continue to work on the remaining dough by re-shapting and patting it to a sheet.
7. Use your thumb to make an indentation in the center of the circle for the jam to be filled in.
8. Fill the indentation with 1 tablespoon of jam
9. Bake the jammer in the 350F pre-heated oven for 35 - 40 minutes.

you must have a cup of cafe Latte ready in time for the jammer out of the oven!

Tuesday, May 18, 2010

Oatmeal Chocolate Chip Cookies from The Grand Central Baking Book

Very easy recipe. The cookies are delicious, especially when they still warm right out of the oven :-)

I love Grand Cenral Bakery and love this baking book!! More recipes on the table soon!

Thursday, May 13, 2010

Kids Bento Box for Adults

Fumiko, another meat lover among my foodie friends, was craving meatballs. I didn't even ask her why, because the reason or her motivation was not important. All I needed to hear was "I want meatballs!"

I had made meatball stew in the past for kids party catering. So I reproduced the same recipe, although I was out of cans of Heinz demi glace sauce and made it from scratch by using my cheat tricks (canned tomatoes, onion, celery, red wine, etc). Meatballs are kids favorite items in Okosama Lunch (kids plate) at casual restaurants and cafes in Japan. Everyone has fond memories of Okosama lunch, but usually you have to be under a certain age (usually 6 years old??) to be "eligible" to order Okosama lunch (what's up with that!?)

Anyway, so here it is; my version of Okosama Lunch bento box for sophisticated adults :-)

Menu: meatballs with creamy tomato & red wine sauce, spaghetti with parsley, fried scallops and fries with hommade tartar sauce, butter rice pilaf with fresh English peas, shrimp toast, octopus wienies, tandoori chicken (this was just added sponteneously ;-))


(Photograghs by Fumiko)


Thursday, April 15, 2010

Et tu, WANN?

Despite those negative reviews (well at least among the Japanese customers) in town, WANN has been one of my favorite IZAKAYA (Japanese tapas bars) for years, especially because of certain tapas dishes they have that you can't find anywhere else, and of course generous Happy Hour deals.

Happy Hour is still available. But it's time for me to say Adieu to my little felow WANN, sad but people have to move on sometimes.

I immediately noticed the changes when I opened the menu. It used to have Japanese translation to each item; now only in English. It wouldn't be that big of a big deal IF the selection had not changed that drastically. No baby squid sashimi, broiled hokke, fried yamaimo (Japanese yam), or pork belly stew....they are all gone from the menu. That hurt.
Trying to hang on to a small piece of hope, I ordered some "remaining" Izakaya items only to face more of the disaster.

Sukui tofu - should be a homemade soft tofu but it tasted just like a store-bought tofu with loads of okaka (bonito flakes)
Chamame - it's supposed to have the "Chamame" flavor but it was just regular edamame.
Gyoza - Thoughtlessly deep fried. It's a Korean style, not Japanese, unless the menu says "deep fried gyoza".

And I was speechless when I saw the Kurobuta sausage (it's a weiner style Japanese sausage with super crispy casing skin. The sausage is so juicy that when you have a bite you should feel a splash of melted grease). Look at the photo. Is it a testicle or something? Please...

The last but not the least, the sushi rice on spicy tuna rolls was squished so hard that rice looked almost like paste.That was the last straw.


It's depressing to see another good authentic Japanese bar turn into a fake, abused Japanese food source. This post might offend some WANN fans, but as a true fan of this once-very-attractive place to enjoy the Japanese tapas experience and proud Japanese foodie, I couldn't help sharing my thoughts with a desperate hope that this tough economy will not deteriorate the joy of the Japanese food pop culure in Seattle any more.

Issian, please do not change. I love you.

Tuesday, April 13, 2010

East meets West in BLT Rolls

"Bacon" is a universal language. In Japan, among all those non-traditional cooking ingredients, bacon has taken its place as one of the most common items in modern Japanese cooking for decades, although not as yet dominating as butter and heavy cream. People love bacon(no need to mention how much we love pork belly). I suspect that there are even a lot of adapted vegetarians that secretly admire bacon (have you not seen products like soy bacon strips??)

Anyway, I'll save to experss my passion for bacon for another time. Last year, I received a very tempting catering order for someone's birthday party; the theme for the party was BACON. I was requested to serve some creative bacon dishes. I can't rememeber any other time of period in my life that I was constantly thinking of bacon, bacon, bacon....after much deliberate planning and practices, I came up with the lineup: bacon greased popcorn, bacon gyoza, bacon & shrimp toast, and BLT rolls and bacon nigiri.

BTL Rolls:
1. Cook sushi rice (let me know if anyone wants to know how to make sushi rice)

2. What to roll: crispy bacon strips, avocados, lettuce, and mayo.

Tips: make sure to pat dry all the filling ingredients, specifically tomatoes. You should seed them.


Nigiri is rather simple. Just fry bacon strips with teriyaki sauce (any bottled sauce should be fine).

If California rolls are so broadly accepted as genuine American sushi rolls, I don't see why not BTL rolls as well!

Believe me - this is good stuff.

Monday, April 12, 2010

Reborn with "Street food of Thailand" - Iyara

I like Thai food, as many others do. And I am one of those who can be super excited with so-called "fusion" Thai(i.e. Americanized Thai) as long as it tastes good. I am starting with this statement because I have never been to Thailand. Speaking of being "authentic", I am not credible to make any judgement of authenticity of Thai cuisine served in the US.


However, when I saw the banner "Now serving Street Food of Thailand" outside the Thai restaurant called "Iyara" near the Redmond Town Center, my taste buds all of a sudden got awaken by the copy and started craving authentic Thai food. Funny, huh?


This restaurant is owne by my former co-worker, Sootha. He has been successful in the current location as well as the original place in Kirland but come up with this idea of introducing "real" Thai food, the kind of dishes the local Thai people would get from the street vendors, only produced in a lot more sanitary environment, he says.

I had been to his restaurant a few times before and noticed that the menu content has been completel renewed this time. Being all excited, I started with my favorite green papaya salad (som tum $7), which has been always on the menu. I love the typical Thai dressing - sweet, sour and spicy. And the addition of the peanut sauce perfects this refreshing dish.

Then following Sootha's recommendation as being the most popular item at Iyara, the next dish was yum muu kham waan $ 9 - grilled pork with spicy chili garlic sauce. The green vegetables in the back are the stems of Chinese broccoli. Both meat and sauce are so flavorful and addictive! I'd go with extra spicy next time...

The last dish this day is khao soi kai $10 - Northern Thai spicy curry noodle soup with chicken on the bone, coconut-milk, pickled green mustard, shallots, crispy egg noodles and roasted chili paste. I am in heaven. The broth is so rich and creamy, and OMG, the chicken is just as tender as it could get. If you are a fan of Panang curry, you'd love this dish.

Friday afternoon I was very satisfied and happy (and went for a 3-mile run afterwards :-)) After all I was too excited to find out which dshes represent street food, but now I'v got a reason to go back!

16421 Cleveland Street
Redmond, WA 98052
(425) 885-3043

Friday, April 09, 2010

Yummy Green Soy Bean Snack

Where you can get dried green soybeans is another question (well, I bought them in Tsukiji in Japan), but if you are lucky to find some here in Seattle (my best bet is Uwajimaya or Maruta), then this is the perfect snack. If you like edamame, you'd LOVE this snack.


Ingredients:
2 cups dried green soybeans
Water
Salt
*Dashi (Japanese broth made of kombu and bonito flake)
1 - 2 tablespoons of soy sauce (preferably light colored)
1 - 2 tablespoons of  mirin
1 teaspoon of salt


*How to make dashi: in a deep pot, put in 2 cups of water, and 2 strips of dried kelp (kombu). Turn on heat over medium heat. Once the water starts boiling add a handful of dried bonito flakes (katsuo bushi) in the pot. After 30 seconds, turn of the heat. Remove the kombu and katsuo bushi. The dashi broth can be stored in the fridge for up to 1 month. You can use it in almost EVERY Japanese dish, including miso soup.


1. Soak dried soybeans in clean water overnight and discard the water.
2. In a deep sauce pan add enough water to cover the soaked soybeans and a pinch of salt. Cook the soybeans for 10 - 15 minutes until the texture of the soybeans becomes similar to edamame (al dente).
3. Strain the soybeans and transfer to a glass bowl. Add in dashi, soy sauce, mirin and salt to your taste. Personally I would skip mirin as I do not like sweetness in the beans.
4. Soak the soybeans in the liquid for half a day. That's it!


You can store the soybeans in a glass jar and I assume it should last for a few weeks or even longer in the fridge. Enjoy this savory & healthy snack as is or with ice cold beer, which might not be as healthy but oh well, I can't help it.

Thursday, April 08, 2010

Razor clams in season!

I got fresh razor clams that my friend Terry and his wife caught a few weekends ago. I had been thinking of the best recipe to enjoy these reasonal delicacy. My original plans were either fried clams or clam chowder but this is what I ended up making, and it was DELICIOUS!

The recipe is super simple and quick!
Ingredients:
1/2 lb Fresh Razor clams
5 - 6 Asparagus
1 stalk celery
1 stalk leek chopped
1 teaspoon minced ginger
1/2 cup Chicken broth or water
2 tablespoon sake
salt & pepper as desired
2 tablespoons potato starch (plus 1 tablespoon)

1. Cut the razor clams into 2 inch pieces and pat dry them. Sprinkle salt and pepper and coat the clams with 2 tablespoons of potato starch.
2. Heat a shallow pan or wok over high heat. Add 1 tablespoon of oil.
3. Add in the clams and sautee them until they are about 80% cooked. Take them out of the pan. Set aside.
4. Add another tablespoon of oil in the pan and add ginger and leek. Once you start smelling the aroma of ginger, add in asparagus and celery. Cook for a minute. Add in the clams.
5. Add the pre-mixed liquid seasoning (chicken broth, sake, and salt&pepper).
6. Mix 1 tablespoon of potato starch and 2 tablespoon of water well, add the mixture in the pan. Toss the veggies and clams well and turn off the heat.

I think this is the best way to enjoy the texture and flavor of the razor clams. The dish is great just to serve as it or over steamed rice.

Friday, March 26, 2010

Revolutionary Bread Making!

I must admit that I was skeptical, even when I tried the wonderful homemade artisan bread that the pottor and my pottery teacher Akiko served at her West Seattle house. She explained to me how easy the recipe was to make such a tasty loaf of bread. The idea was really inspirational but it has slipped off my mind over time.

A few weeks ago I ran into this book (”Artisan Bread in Five Minutes a Day,”  by Jeff Hertzberg and Zoë François) by accident while shopping for "The Grand Central Baking Book"on Amazon.com.

"Oh, this is the "file minutes a day" book that Akiko mentioned before!"
This time, I immediately hit "purchase" button for a copy.

Wow. How possibly could bread making be this easy? The copy on the book cover was not exaggerating. Literally, it was a jaw-dropping experience. I had never been into baking (especially bread) because of the long, complicated steps you need to go through, but this book instantly converted me to a pseudo baker & fresh bread aficionado, who now looks forward to getting home and rushing into the kitchen to take the stored dough out of the fridge. Rising time - 40 min. Baking time - 30 min. But the prep time - 5 minutes!

Look how "Professional" the bread looks and acutally tastes like the ones fresh from the bakery too :-)


The recipes below are abstracted from the book ”Artisan Bread in Five Minutes a Day,” by Jeff Hertzberg and Zoë François, with my own notes added.

Ingredients: 3 cups lukewarm water, 1-1/2 tablespoons granulated yeast, 1-1/2 tablespoons kosher or other coarse salt, 6-1/2 cups unsifted, unbleached, all-purpose white flour, measured with the scoop-and-sweep method, Cornmeal for pizza peel

1. Add yeast and salt to the lukewarm water in a bowl or in a resealable, lidded (not airtight) plastic food container or food-grade bucket. You don't have to worry about dissolving all the dry ingredients.
2. Add the flour at once, measuring it in with dry-ingredient measuring cups, by gently scooping up flour, then sweeping the top level with a knife or spatula; don't press down into the flour as you scoop or you'll throw off the measurement by compressing. Kneading is unneccesary! You're finished when everything is uniformly moist, without dry patches. This step only takes up to 30 seconds.
3. Cover with a lid (not airtight). Allow the mixture to rise at room temperature until it begins to collapse (or at least flattens on the top), approximately 2 hours.You can use a portion of the dough any time after this period. Store the dough in the container in the fridge.
4. On the bake day: Sprinkle the surface of your refrigerated dough with flour. Pull up and cut off a 1-pound (grapefruit-size) piece of dough, using a serrated knife. Hold the mass of dough in your hands and add a little more flour as needed so it won't stick to your hands. Gently stretch the surface of the dough around to the bottom on all four sides, rotating the ball a quarter-turn as you go. Most of the dusting flour will fall off; it's not intended to be incorporated into the dough. This process should be 30 to 60 seconds.
5. 20 minutes before baking, preheat the oven to 450°F, with a baking stone (or a cast iron pan, or dutch oven, or cookie sheet - in my case, the cast iron worked perfectly.) placed on the middle rack. Place an empty broiler tray.
6. Place the shaped ball on the cornmeal-covered pizza peel (or parchment paper). Allow the loaf to rest on the peel for about 40 minutes at room temperature.
7. Dust the top of the loaf liberally with flour, which will allow the slashing knife to pass without sticking. Slash a 1/4-inch-deep cross, "scallop," or tic-tac-toe pattern into the top, using a serrated bread knife.
8. After a 20-minute preheat, slide the loaf onto the preheated baking stone(or whatever the base you choose). Quickly pour about 1 cup of hot water from the tap into the broiler tray and close the oven door to trap the steam. Bake for about 30 minutes, or until the crust is nicely browned and firm to the touch. Allow to cool completely, preferably on a wire cooling rack.

For the full instructions, you check this site.

The steps seem sort of long, but they are not. Very simple, and once you have the dough stored in the fridge, you can enjoy fresh baked loaves of bread anytime you want!

Using the same dough, you can bake baguettes as well. I'll give it a try this weekend!

Tuesday, March 23, 2010

Simple pasta recipe: Orrechiette with broccoli & Linguini with creamy sea urchin sauce

Both pastas are very simple recipes that do not call for tomato sauces.


Orrechiette with Broccoli and guanciale
San Gallo restaurant in Rome, where I worked for a few days two years ago, used Romanesco broccoli but I substituted it with green califlower (you can use regular broccoli too).


1. Start boiling orrechiette.
2. In a sauce pan fry minced guanciale (or pancetta) over low heat. Once the guanchiale pieces turn nice and brown, discard the grease and set the guanciale aside.
3. In the same pan, add olive oil and minced garlic. Over low heat cook the garlic until golden brown.
4. Add chopped broccoli and guanciale. Add a bit of water from the pasta pot to fully cook broccoli.
5. Add cooked orrechiete in and season with salt and pepper.
6. Add plenty of grated pecorino cheese and serve.

Linguini with fresh sea urchin sauce
The key to this recipe is sea urchin of course. Surprisingly, you can get premium sashimi quality local sea urchin at Uwajimaya (well to me it was a big surprise.). I'd say sea urchin from Puget Sound could well compete with sea urchin from Hokkaido. No need to go for imported sea urchin!

(serves 1)
1. Start boiling linguini.
2. In a sauce pan, cook minced garlic (1 teaspoon) in olive oil over low heat.
3. Add white wine (50cc) and evaporate alcohol.
4. Add crushed canned tomato (1 tablespoon) and chopped Italian parsley (1 tablespoon) in and reduce the liquid till it gets heavier consistency.
5. Add heavy cream (100cc) and season with salt and pepper. Reduce the sauce down to 2/3 of the original volume.
6. Add sea urchin (2 oz) and butter (1 teaspoon). Do not overheat from this point on. Take the pan off the heat if necessary.
7. Add teh linguini and toss with the sauce.

Sunday, March 21, 2010

Food truck review: Paladar Cubano


I had heard good feedback on Paladar Cubano from my friends that had tried their food, so it's been on my To-go list for a while.

Yesterday was the perfect opportunity - the first day of spring, very warm (~70 degrees) and sunny Saturday. And I was VERY hungry.

The food truck (and a eat-in tent adjacent to it) is located right off the HWY 99 near Greenlake, which is promising because there is another food truck (el Camion )on the same street up north near Home Depot. Are those used car dealers, cheap motels and pawn shops on the Aurora ave going to be replaced with the global gourmet food vendors? Highly doubt it but everything starts with dreams :-)

Anyway, the food. I was told the service was kind of slow, but the general rule is that if you decide to get served Latin American food, you have to be ready to deal with different time zones, Cuban time, in this case. Our number was #46, when the order for #37 was called. The wait was about 30 + minutes.

Instead of eating in the tent with no sunlight coming in, we decided to drive down to the Golden Gardens to have a picnic lunch on the beach. The sandwich we ordered was Pan con Lechon (shredded roasted pork with grilled onions and green aioli(?) sauce on cuban bread) $5.50. Very tender meat with very flavorful but not overwhelming flavor and right amount of grease and fat (in my standard :-)). The green sauce (we couldn't figure out excatly what it was but some kind of green aioli I guess) was a perfect match with the meat and sauteed onions. This sandwich is probably not one of their best sellers but we loved its simple yet rich pulled pork!

The side order of ham croquettas would be ideal with ice cold beers because of its salty and creamy filling. It's my kind of food :-)

Paladar Cubano
8953 Aurora Ave North
Seattle, WA 98103
Open Mon-Sat 11:30 am to about 6:30
or when we run out of food!

Friday, February 19, 2010

Ultimate Rib Eye Steak Fried Rice


Have you ever finished a whole rib eye steak at a steakhouse? I haven't, and I love taking the leftover with me because the highlight of eating rib eye steak to me is to enjoy steak fried rice at home afterwards!

Here are my special recipes of the ultimate rib eye steak fried rice.

1. Cook one cup of short grain white rice
2. Slice 3 cloves of garlic. Mice 1/2 onion, chop 1 tablespoon of parsley.
3. Cut the leftover steak meat into half an inch cubes. Lightly coat the cubes with salt and pepper.
6. In a skillet, heat 1 tablespoon of canola oil over low heat. Add garlic and cook it until the aroma of garlic becomes distintive.
7. Put the garlic slices a side and add minced onion into the skillet, over medium - high heat. Cook until the onion gets translucent.
8. Turn up the heat to high, add steak in. Cook it to well-done.Add 1 teaspoon of soysauce over the meat and toss.
8. add rice and garlic. Add 2 tablespoons (or more if you like) of butter in. Sautee the rice well. Season with salt and pepper as desired.
8. Turn off the heat and mix in the parsley.

It's dangerously addictive. Caution: Check your cholesterol level first.